Grab the latest CicadaTAK image (~1 GB download, ~10 GB written — use a 64 GB card; the offline-map store grows to fill it). Includes the node OS, the gateway, the setup wizard, and CONUS map tiles.
Flash
Write the image to a microSD card using Raspberry Pi Imager. Select "Use custom" and browse to the file.
Boot
Insert the SD card, power on the Pi, connect to its WiFi from the CicadaTAK app. The wizard does the rest.
Update
Already running a node? Compare its firmware date (app → Settings → This Node → Node Firmware) to the version above. If it's older, update in place (~73 MB) — no re-flash, easiest through the app.
Want an email when a new image ships? Join the release list · email only · no tracking · unsubscribe any time
//Step-by-step
Download the firmware image using the button above or this link
Download and install Raspberry Pi Imager for your platform (macOS, Windows, or Linux)
Open Pi Imager and click "Choose OS"
Scroll to the bottom, select "Use custom", then browse to the downloaded .img.gz file
Click "Choose Storage" and select your microSD card
Click "Write" and wait for the flash to complete (~2 minutes)
Eject the card, insert it into the Pi, and power on
//Updating a running node — through the app
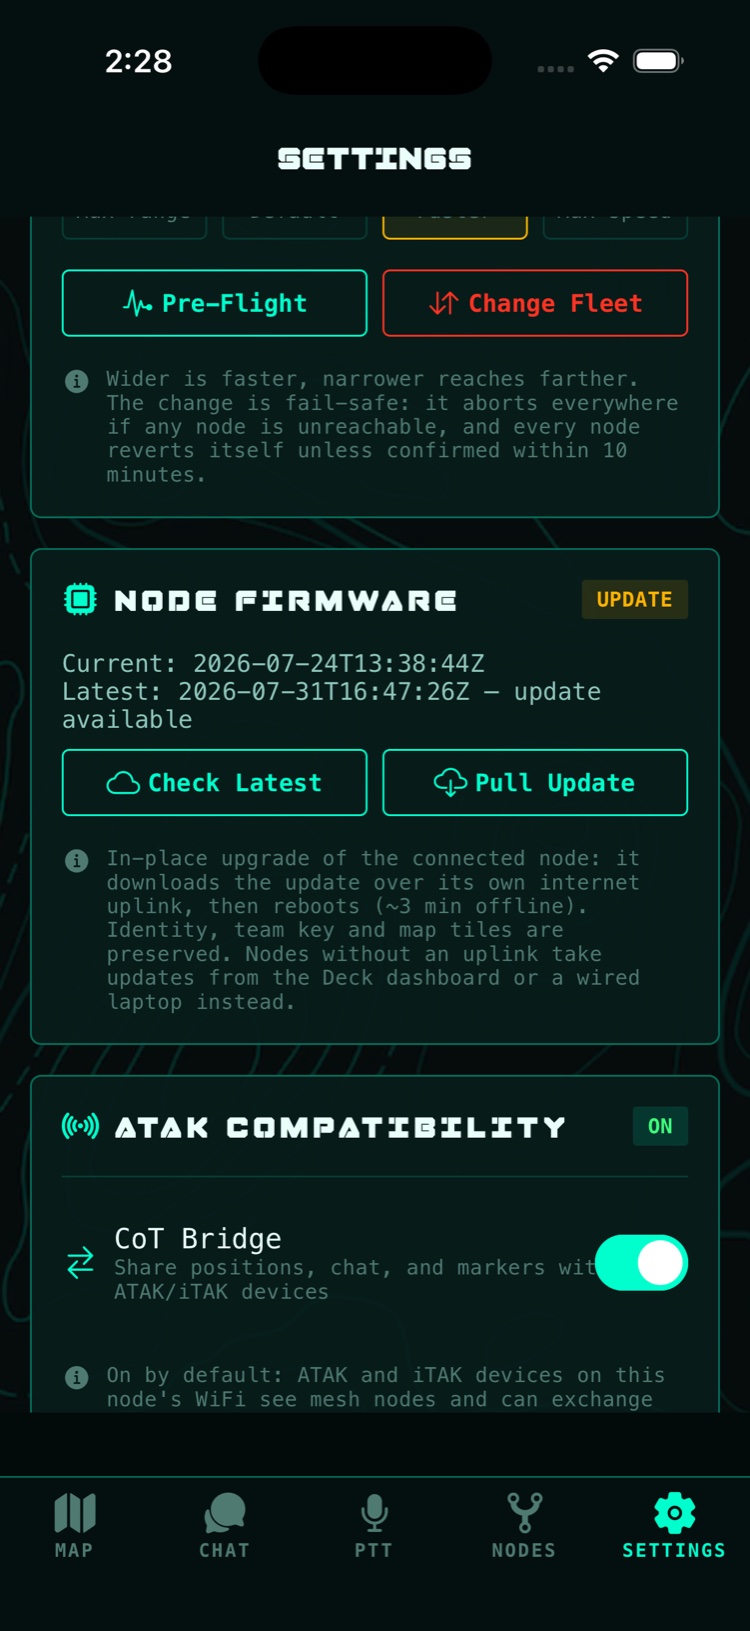
A node that's already on the mesh never needs re-flashing — the CicadaTAK app updates it in place. Open Settings → This Node → Node Firmware and tap Check Latest: the card shows your node's firmware date next to the latest release, so you know at a glance whether an update is due. If it is, Pull Update downloads it over the node's internet uplink and Apply installs it — no computer, no SD card.
The node reboots (~3 minutes) and comes back with its identity, team key, and downloaded maps intact — it does not re-run the setup wizard. Don't cut power mid-update.
No internet at the node? Grab the update file on a laptop, plug into the node's wired port, and upload it at http://10.41.253.1:8080/update. In-place updates need an image from 2026-07-24 or newer — older nodes take a fresh card from the full image above. Details in the guide.
Settings → This Node → Node Firmware — Check Latest flags an update the moment one ships.
//Alternative — Pi Imager custom repo
Add CicadaTAK directly to the Raspberry Pi Imager OS selection menu: